|
|
Post by scottydugg on Jul 13, 2021 12:56:25 GMT
Rear lips certainly look smart, I've been trying to find a second hand one for a while, I refuse to buy a new one to hack up to fit a dual exit.
|
|
|
|
Post by batou on Jul 13, 2021 13:26:53 GMT
Rear lips certainly look smart, I've been trying to find a second hand one for a while, I refuse to buy a new one to hack up to fit a dual exit. Same, I caved in though, really you'd be lucky to get one unless its off a breaker as once you've committed to making holes in the bumper you're not going to change your mind and sell it lol |
|
|
|
Post by atlex on Jul 13, 2021 13:28:27 GMT
that looks really good.
|
|
|
|
Post by batou on Jul 27, 2021 19:21:27 GMT
EXTERIOR & MAINTENANCE
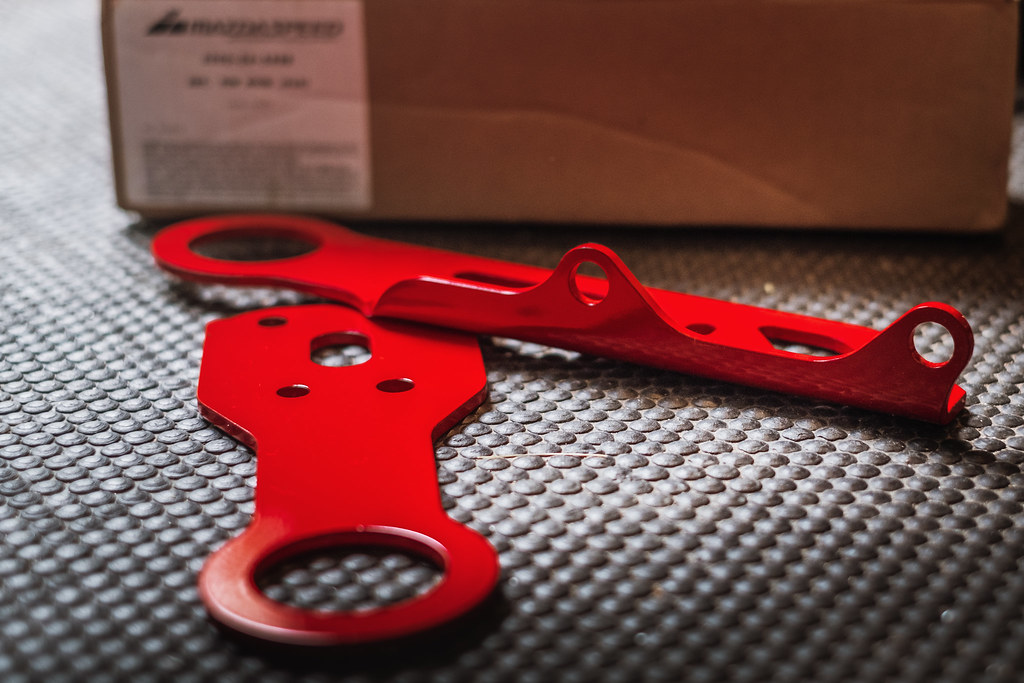
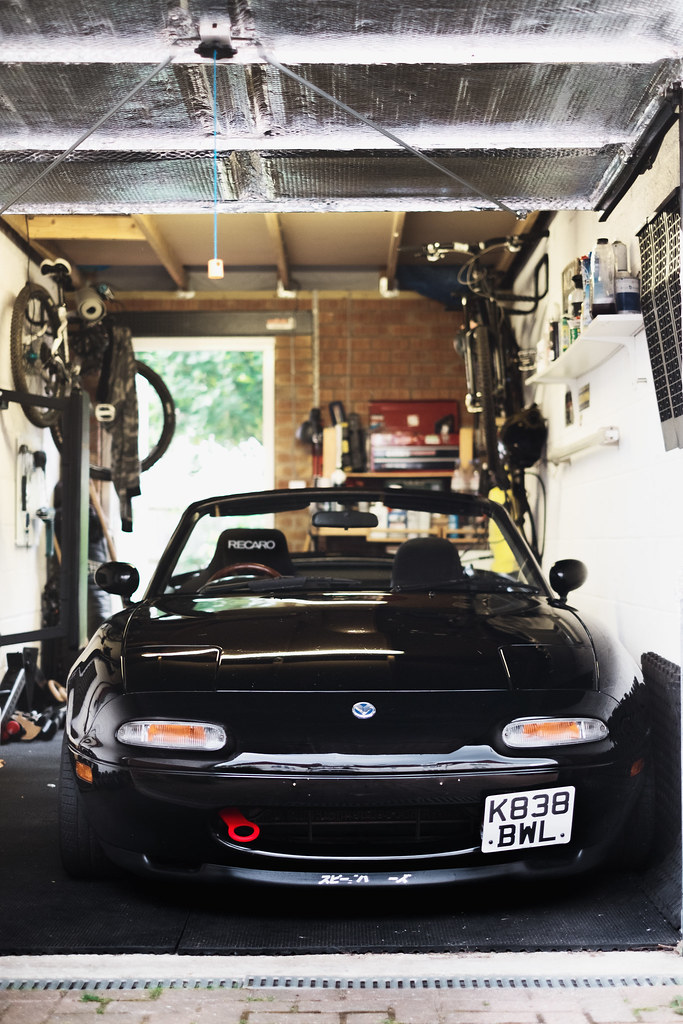
# MazdaSpeed Racing Tow Hooks Front & Rear# Power Steering fluid change, Redline Fully SyntheticI originally ordered these before the Llandow track day earlier this month but they ended up on backorder, good job I didn't end up needing a tow that weekend   MazdaSpeed Tow Hooks MazdaSpeed Tow Hooks by batousan, on Flickr For some reason people make a bit of a meal out of removing the "baby teeth" on these, 10 minute job on the front. One of the bolts is a bit tight access wise but just have to get it from the right angle. Also left the bolts to soak in penatrant fluid for a few hours or so before having a go.  MazdaSpeed Tow Hook - ユーノス ロードスタ S-SPECIAL NA6CE MazdaSpeed Tow Hook - ユーノス ロードスタ S-SPECIAL NA6CE by batousan, on Flickr The rear was easy enough as I'd removed one of the rear oem hooks before when doing the rust treatment, however, whilst its still useable on the rear with the r-package lip, its not exactly that visible. Also while I was checking diff/exhaust clearance (Asahi for reference) I noticed that the camber has moved on one of the rears since the track day, Llandow has few kerbs that I did take some liberty with so probably that. Will have to get it moved back   Another thing I had at the track day was the power steering fluid was frothing up and overflowing after a few sessions, didn't give me any steering issues thankfully but made a mess and it can't hurt to change it to something better. I siphoned pumped out the old stuff, moved the steering lock to lock and got as much out as I can before refilling, its not exactly a perfect drain flush but can't really be that fussed to faff that much. 
|
|
|
|
Post by batou on Aug 1, 2021 21:26:06 GMT
SUSPENSION & CHASSIS# GCFabrications GC3 Roll Bar

ユーノス ロードスタ S-SPECIAL NA6CE by batousan, on Flickr
So, after a couple of months of waiting the gcf bar finally arrived. I swear that chap must literally churning these out every day now as the back orders for these are crazy. Worth the wait though, very pleased with the fit and finish.

GCFabrications Roll Bar - ユーノス ロードスタ S-SPECIAL NA6CE by batousan, on Flickr
I don't really have an accurate way of weighing these so excuse the rather primative method of weighing myself holding the bar, I've lost 9-12kg since last year myself by taking a break from weight lifting so already made up for the additional weight lol. Although lifting this thing in and out of jacked up car car several times on my own while I triple checked the measurements made we wish I was training again, feel a bit beat up today  . .
It feels in the region of around 20kg, but the scales say around 18kg on not the best surface for accuracy but all in all, not as heavy as I expected thankfully... (excuse the manky garage slippers  ). ).

GCFabrications Roll Bar - ユーノス ロードスタ S-SPECIAL NA6CE by batousan, on Flickr
So there is a fitting guide on GCfabs facebook, but it seems to have evolved somewhat and theres other people commenting on this and that so I looked at that but also used my own intuition on this. I feel the guide suggests to remove a lot of metal when depending on the car/bar you have you don't always need to remove so much. Just normal tools for the job but damn, this thing sure comes in clutch, I only broke two of the retaining clips....

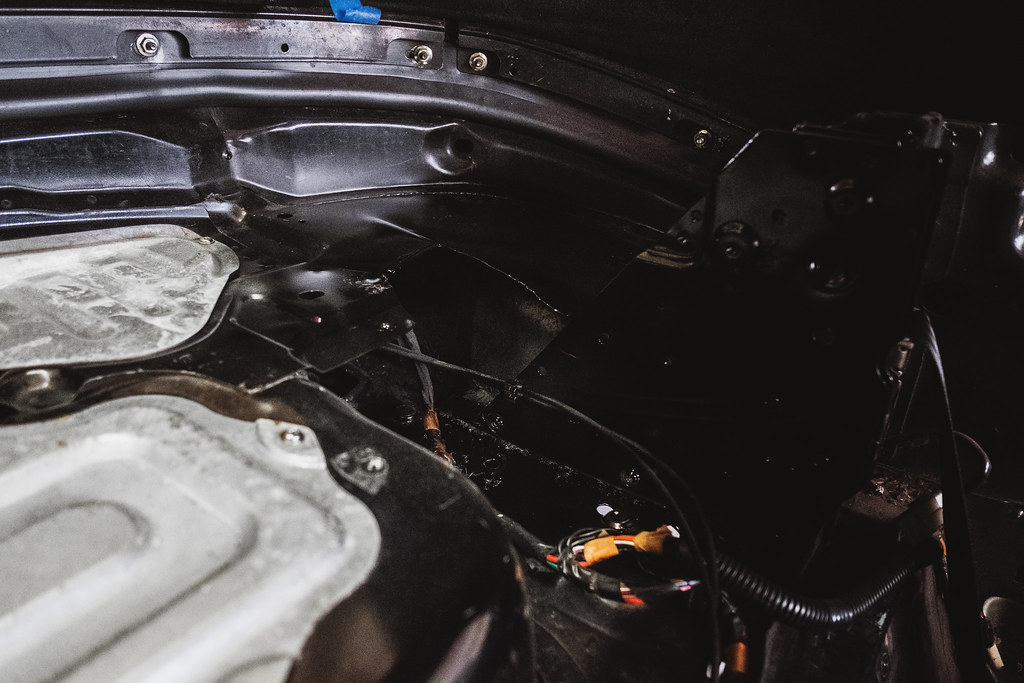
After I got over the fear of potentially setting fire to the hood from using a angle grinder in the car with the roof up lol, I did some initial cuts and then measured up, as I mentioned I took out a lot less than the guide suggested and the bar fitted. I didn't take too many pics of the process as I wanted to keep my mind on the job, but this is what the passenger side looked like after cutting and painting up. I later used some plastic trim edging to snap over the edges just to tidy things up and ensure there are no sharp edges. This made sure the bar didn't get scratched up when fitting too.


When it came to drilling, what I did was got the bar in place and put in the seat tower bolts in, then I used a tyre paint pen (I use this for marking stuff on the car, not jazzing up my tyres) to mark the holes. Removed the bar and then used a centre punch to create the holes in the exact spot I marked. Wow, I can see why the bar comes with plates for underneath the car, the centre punch goes through good solid metal fairly easily.

I used a 12mm titanium hss drill bit to make the holes, and they went through easy enough with no mistakes. All lined up perfectly. I then treated the holes/cuts with rust convertor/treatment (no rust but just to be safe), 2 coats of zinc rust inhibiting primer and then top coated with brilliant black paint. Waited for this to try than covered the underneath area, and inside the holes with Bilthamber dynax s50 cavity wax. I also coated the plates with this just to further prevent any water ingress into this area. I left all this to dry inbetween of course and had a very late lunch (started at 10am, its now 2pm).
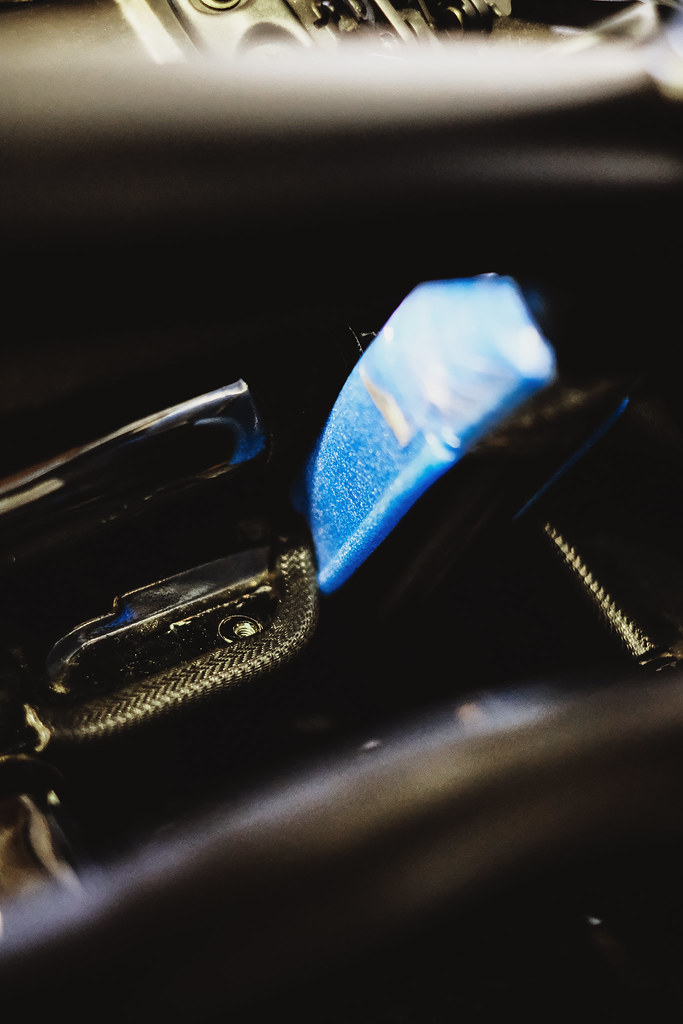
As I wanted to leave the wax to cure overnight I started on trimming the metal shelf, I think I may have took more out of this than needed but it was abit of a faff to get in, this is where the guides poor ordering didn't help me, I'd already refitted all of the plastic seatbelt trims and bolted the tower and belts back in and couldn't face removing it all again, so I managed to get the shelf in and around all that after trimming. Again, I used edging trim on all the exposed metal (of course I deburred all the edges but again, it just neatens things up. Also something you keep seeing in these pictures i the blue padding the bar comes wrapped in, I suggest leaving as much of this on as you can get away with and remove in stages as and when you need to like I did. There is a high chance you'll scratch the bar/car if you remove it all at once.

Heres everything I cut out, as you can see theres more parcel shelf than body metal, it really doesn't look like I took much out of the body does it? Got away with not cutting any spot welds in the shelf area, the only spot welds I drilled out were to remove the shelf sections that are attached to the seat belt towers 
 
Did a few other jobs on the car before I called it a day, watched F1 qually and had a few beers and finished off the rest the next day. Bolting up was an absolutely ball ache, unless you're too weak to lift the bar over your head then this is the only part I'd suggest needing a second person for the job. It is possible to get a spanner on the bolt heads and wedge it so you can do up the nuts, but as you know they can slip off, so a few times it led to me slamming my wrist into something in the wheel area (I have a nice lump and very sore wrist now thanks to that), so after a lot of swearwords bending into an awful posture to hold the spanner up top and tighen under the car I was done bolting in. Sprayed a final coat of Dynax s50 in the areas under the car and popped the liners back in, wheels on and finally dropped the car.
All that was left was to fit the trimmed metal shelf and then refit the carpets, trim around the bar legs and get the seats back in, was pleased with how neat it all turned out...

Chucked the seats back in and torqued them down proper and wrapped the harnesses correctly to the bar and admired the finished result. Could have done this in half a day if I'd rushed it and cut some corners here and there but nice to take time with these kind of jobs. I need to get something to protect the harness bar as there is a contact point with the harness buckles on one side, I've just popped some blue tape on there for now.
 
Recaro SPG / Takata Race4 - ユーノス ロードスタ S-SPECIAL NA6CE by batousan, on Flickr
So, after waiting for a break in the weather I took it out for a spin and was very pleased with how it felt. Car feels proper solid and together, a lot less wobbling, especially at speed and there really is a lot to be said for being harnessed in when you're pressing on through the corners/braking hard. Money well spend indeed, very pleased with how this thing now looks on the road...


ユーノス ロードスタ S-SPECIAL NA6CE by batousan, on Flickr
|
|
|
|
Post by batou on Aug 1, 2021 21:34:23 GMT
Also fitted one poly exhaust hanger in the centre, might pick up another for the cat/decat section too not entirely sure how much I've gained clearance wise, maybe 10-15mm or so depending on movement, the old rubber one was quite saggy and easy to flex. I've also used a jubilee clip on the rear hanger to cinch it up somewhat. I used a powerflex EXH015 which has the same hole diameter at 9.5mm...  Powerflex EXH015 - ユーノス ロードスタ S-SPECIAL NA6CE Powerflex EXH015 - ユーノス ロードスタ S-SPECIAL NA6CE by batousan, on Flickr |
|
|
|
Post by atlex on Aug 1, 2021 21:53:35 GMT
very nice. great patience for such photography, I suspect. :-)
|
|
|
|
Post by batou on Aug 7, 2021 17:00:28 GMT
Decided to replace a few more of the floppy exhaust mounts, also trying to track down a dreaded buzz from the manifold heat shields so I've now added my 3rd stainless steel jubilee clamp, a few more of these and I'll end up creating a stainless mani out of clamps  . I know I should probably change it out, as I'll be forever chasing these rattles but Canoesake are they pricey new if you want a decent one and I have a few more costly priorities to deal with right now *cough* s u b a r u *cough*   Powerflex EXA015 mounts - ユーノス ロードスタ S-SPECIAL NA6CE7 Powerflex EXA015 mounts - ユーノス ロードスタ S-SPECIAL NA6CE7 by batousan, on Flickr very nice. great patience for such photography, I suspect. :-) Thanks, yup just another expensive hobby of mine  . |
|
|
|
Post by batou on Sept 7, 2021 12:22:09 GMT
Nothing major to report here, Subaru is on life support at the moment so putting way more mileage on the Roadster this year, mot had no issues other than an advisory of the gearbox oil weep I know I need to sort (will do once sorn) and some worn tyres (I blame Llandow) but I thought I'd share the pain and ancipation of waiting for my new wheels...  (Coming soon-ish) Made some good investments this year and decided to get myself a late 40th birthday present. Hoping to take delivery mid october ish so might get a cheeky test fit and reveal around then before they are either ceramic coated or have several layers of wax applied and shelved until next season, not sure how I feel about wheels that cost more than I paid for the car yet, or about cleaning rodders dust off 3"+ of polished and anodised dish but its too late now  |
|
|
|
Post by atlex on Sept 7, 2021 13:26:41 GMT
it should be yummy.
I'm _still_ waiting on my new cams. White car has been sitting there for months undriven. So it goes..
|
|
|
|
Post by batou on Sept 16, 2021 12:51:28 GMT
ENGINE & DRIVETRAIN# ARC-Brazing Magic Intake Chamber These items are getting rare in good condition, most are very dented or have the logo/branding missing. This one I picked up was in really good condition with no damage just signs of use and needed a polish, the all important ARC branding nicely intake along with the hilarious jingrish, odd spelling too... "The ARC MAGIC is wonders assenbled project. They present comfortable and unknown car life with ARC magic power." I get what they were trying to say, but you can't help but laugh, absolutely brilliant.  I gave it a very quick sand with 600 > 800 > 1000 > 1200 grits then cleaned and buffed slightly with WD40 and metal/aluminium polish. I could spend a lot more time on it and get it done to a mirror finish but its already the cleanest thing in my engine bay so going to leave it here for now as I'm well pleased with the result.  ARCインテークチャンバー 希少 MAZDA ロードスター NA6CE ARCインテークチャンバー 希少 MAZDA ロードスター NA6CE by batousan, on Flickr I bought this mainly because I like the looks, I'm a sucker for obscure random parts from 90s era Japan and needed something to keep my want for ITBs at bay for now. These are getting rare enough to justify them as they won't be getting any cheaper now the sellers on Yahoo auctions have caught on. I picked this one up from Steve Nagoya on FB market place, great chap to deal with.  After fitting I noticed the higher rev sound is improved and more aggressive sounding. I already had the Blitz Sus Power Stainless Intake C2 Type fitted before the chamber was added so it was a nice suprise to further enhance the sound. Driving impression feels like the down shifting and throttle press has a more free feeling and smoother rev's and a slight better pull in the higher rev range. Dyno graphs on other cars have shown 5.9ps improvement over OEM so on a low power car it might be worthwhile addition if you want to stay NA without ITB.  Here are some sound clips that give a rough idea of what it sounds like, I'll do some ones on the move at somepoint too... And lastly, I found some pages of the original manual doing some random googling, the diagram is hilarious and I love the spec of the car on the front...   ARCインテークチャンバー 希少 MAZDA ロードスター NA6CE ARCインテークチャンバー 希少 MAZDA ロードスター NA6CE by batousan, on Flickr
|
|
|
|
Post by batou on Sept 20, 2021 8:59:51 GMT
Had a laugh chasing this over the weekend...   ユーノス ロードスタ S-SPECIAL NA6CE & GR Yaris ユーノス ロードスタ S-SPECIAL NA6CE & GR Yaris by batousan, on Flickr I really envied that ground clearance on the Yaris, I can honestly imagine anyone who fits the -40mm Nitron dampers is going to love the Garyis on track and hate themselves on B roads lol  . Good news on the wheels, I can't quite believe my luck, but the expected build date was due to complete mid October but just a few days ago I got a dispatch email and a UPS tracking reference which has an estimated delivery date literally the day before my 40th birthday at the moment (which is this week), you couldn't make this s.hit up lol. Think I've settled on the Nankang NS2Rs for now, I haven't ordered them but thats what I'm sure I'll be going with. I understand they are a little noisy, but the grip more than makes up for that I think. Also given they are a 180TW street/track tyre it will help to put me off taking the car out in bad weather and serve me well as a dry only tyre. If I'm brave enough to hit Llandow on the Equips next year then it should be nice to have that extra grip. Edit. Just ordered the N2Rs... 20% off on ebay at the moment. £220 for 4, what a deal  The short list I had was: # NS2Rs - £60 a tyre, proven, tried and tested and I've seen pics of how they look/fit on a same size rim/tyre so known quantity. # Advan Fleva v701 - Replacement for S drives, focus more on wet grip and hard to find stock/pricey when you do in the size I wanted. # Michelin Pilot Sport 3 - This was a close 2nd and I swapped between these and NS2Rs a few times in my mind, seen how the look in the right sizing and supposed to be a great tyre but the good reviews show they put focus more on wet braking rather than dry handling for this version of the tyre. They are quite soft apparently and the wear would have them chunk at Llandow I think. If PS4's were available in the right size I'd probably go with those though. # Toyo Proxes TR1 (the new one, not the old T1R) at £35 a tyre these are almost too well priced to ignore, not many new reviews on these apart from Bofi who really didn't rate these and the soft, squishy sidewalls apparently cause a lack of feel/feedback due to sidewall roll as well poor performance. Probably due to new tyres coming up larger in size now (because safety/EU nannying) and wobblying tread patterns focusing more on wet grip (because safety/EU nannying). # Zestino Gredge 07R - These were/are also a close consideration, bit more of a street tyre than the NS2Rs at 240TW but still a drift/track focused compound. However, there isn't much feedback on these, and when there is, its mixed and their price has gone up quite a bit in the last few years. The last thing I need is a tyre failing on me and ruining one of these rims so something that is proven to take abuse like the NS2Rs is a safer option for the time being. |
|
|
|
Post by batou on Sept 23, 2021 19:29:06 GMT
So, earlier than anticipated, the new set of wheels arrived today. Need to do some test fitting over the weekend as they are custom specs, we'll see if we need more/less camber, how much rolling etc but first things first lets hope they clear the brakes  . Part of me looked at them and thought "why the fk would I fit these instead of mounting them on the wall like some sort of art piece"  . Easily the nicest piece of metal I've ever purchased thats for sure, holy s.hit...  Workwheels EQUIP03 - エクイップ・ゼロスリー Workwheels EQUIP03 - エクイップ・ゼロスリー by batousan, on Flickr Needless to say, I'm over the moon with how they look, fingers crossed my vision of how they will look on the car will play out. |
|
|
|
Post by moclan on Sept 24, 2021 8:27:40 GMT
those look quite nice if I may say so  |
|
|
|
Post by boggissimo on Sept 24, 2021 10:19:54 GMT
Edit. Just ordered the N2Rs... 20% off on ebay at the moment. £220 for 4, what a deal  Got a link? I could do with some new dry semi-slick tyres for next season |
|